
Trim, Reconsidered
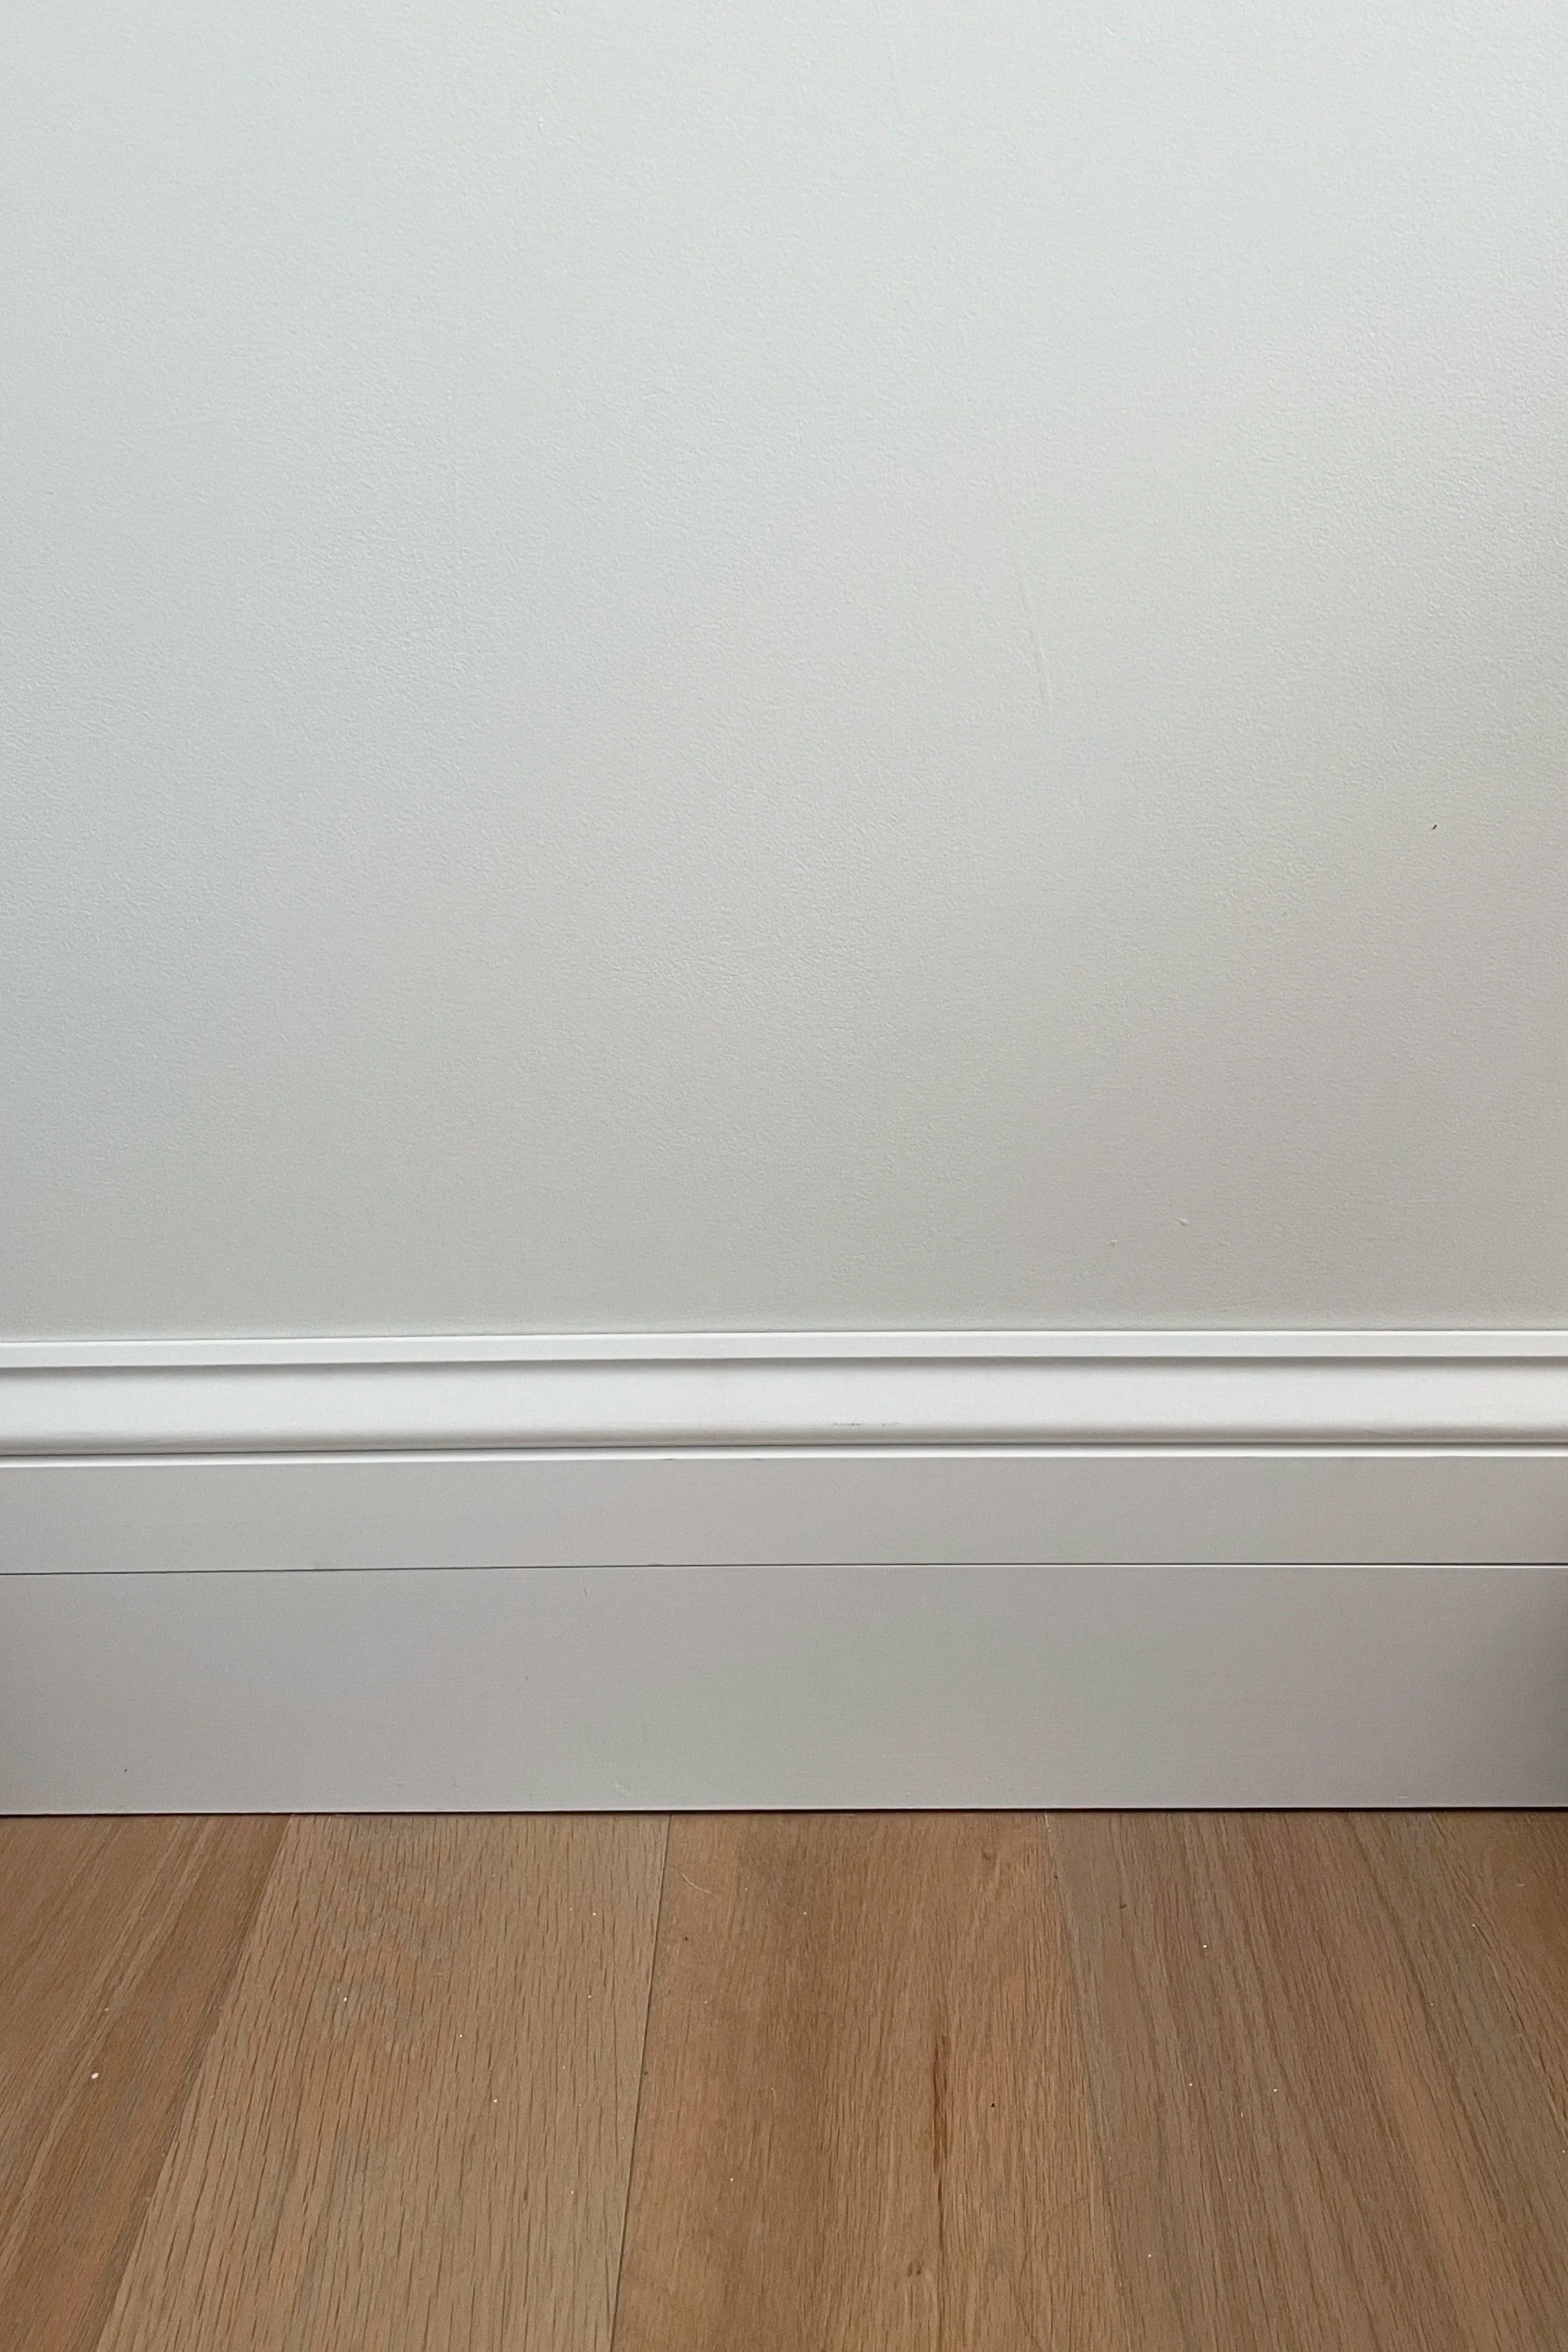
The baseboards in our new construction are the standard square trim you see in many newer homes. Present, but not doing any real work. I knew I wanted to elevate them and introduce more architectural character, but because the decision would ultimately be replicated throughout the entire house, I kept procrastinating.
I really love millwork. I think it’s one of the primary elements missing from many newer homes — the thing that gives a space dimension, shadow, texture, and a sense of permanence. Without it, rooms can read visually flat.
Millwork frames a room. It creates contrast, depth, and moments for the eye to land. And baseboards, specifically, are one of those details that quietly determine how a space feels. When the proportions are right, you barely notice them. When they’re wrong, something always feels slightly unresolved.
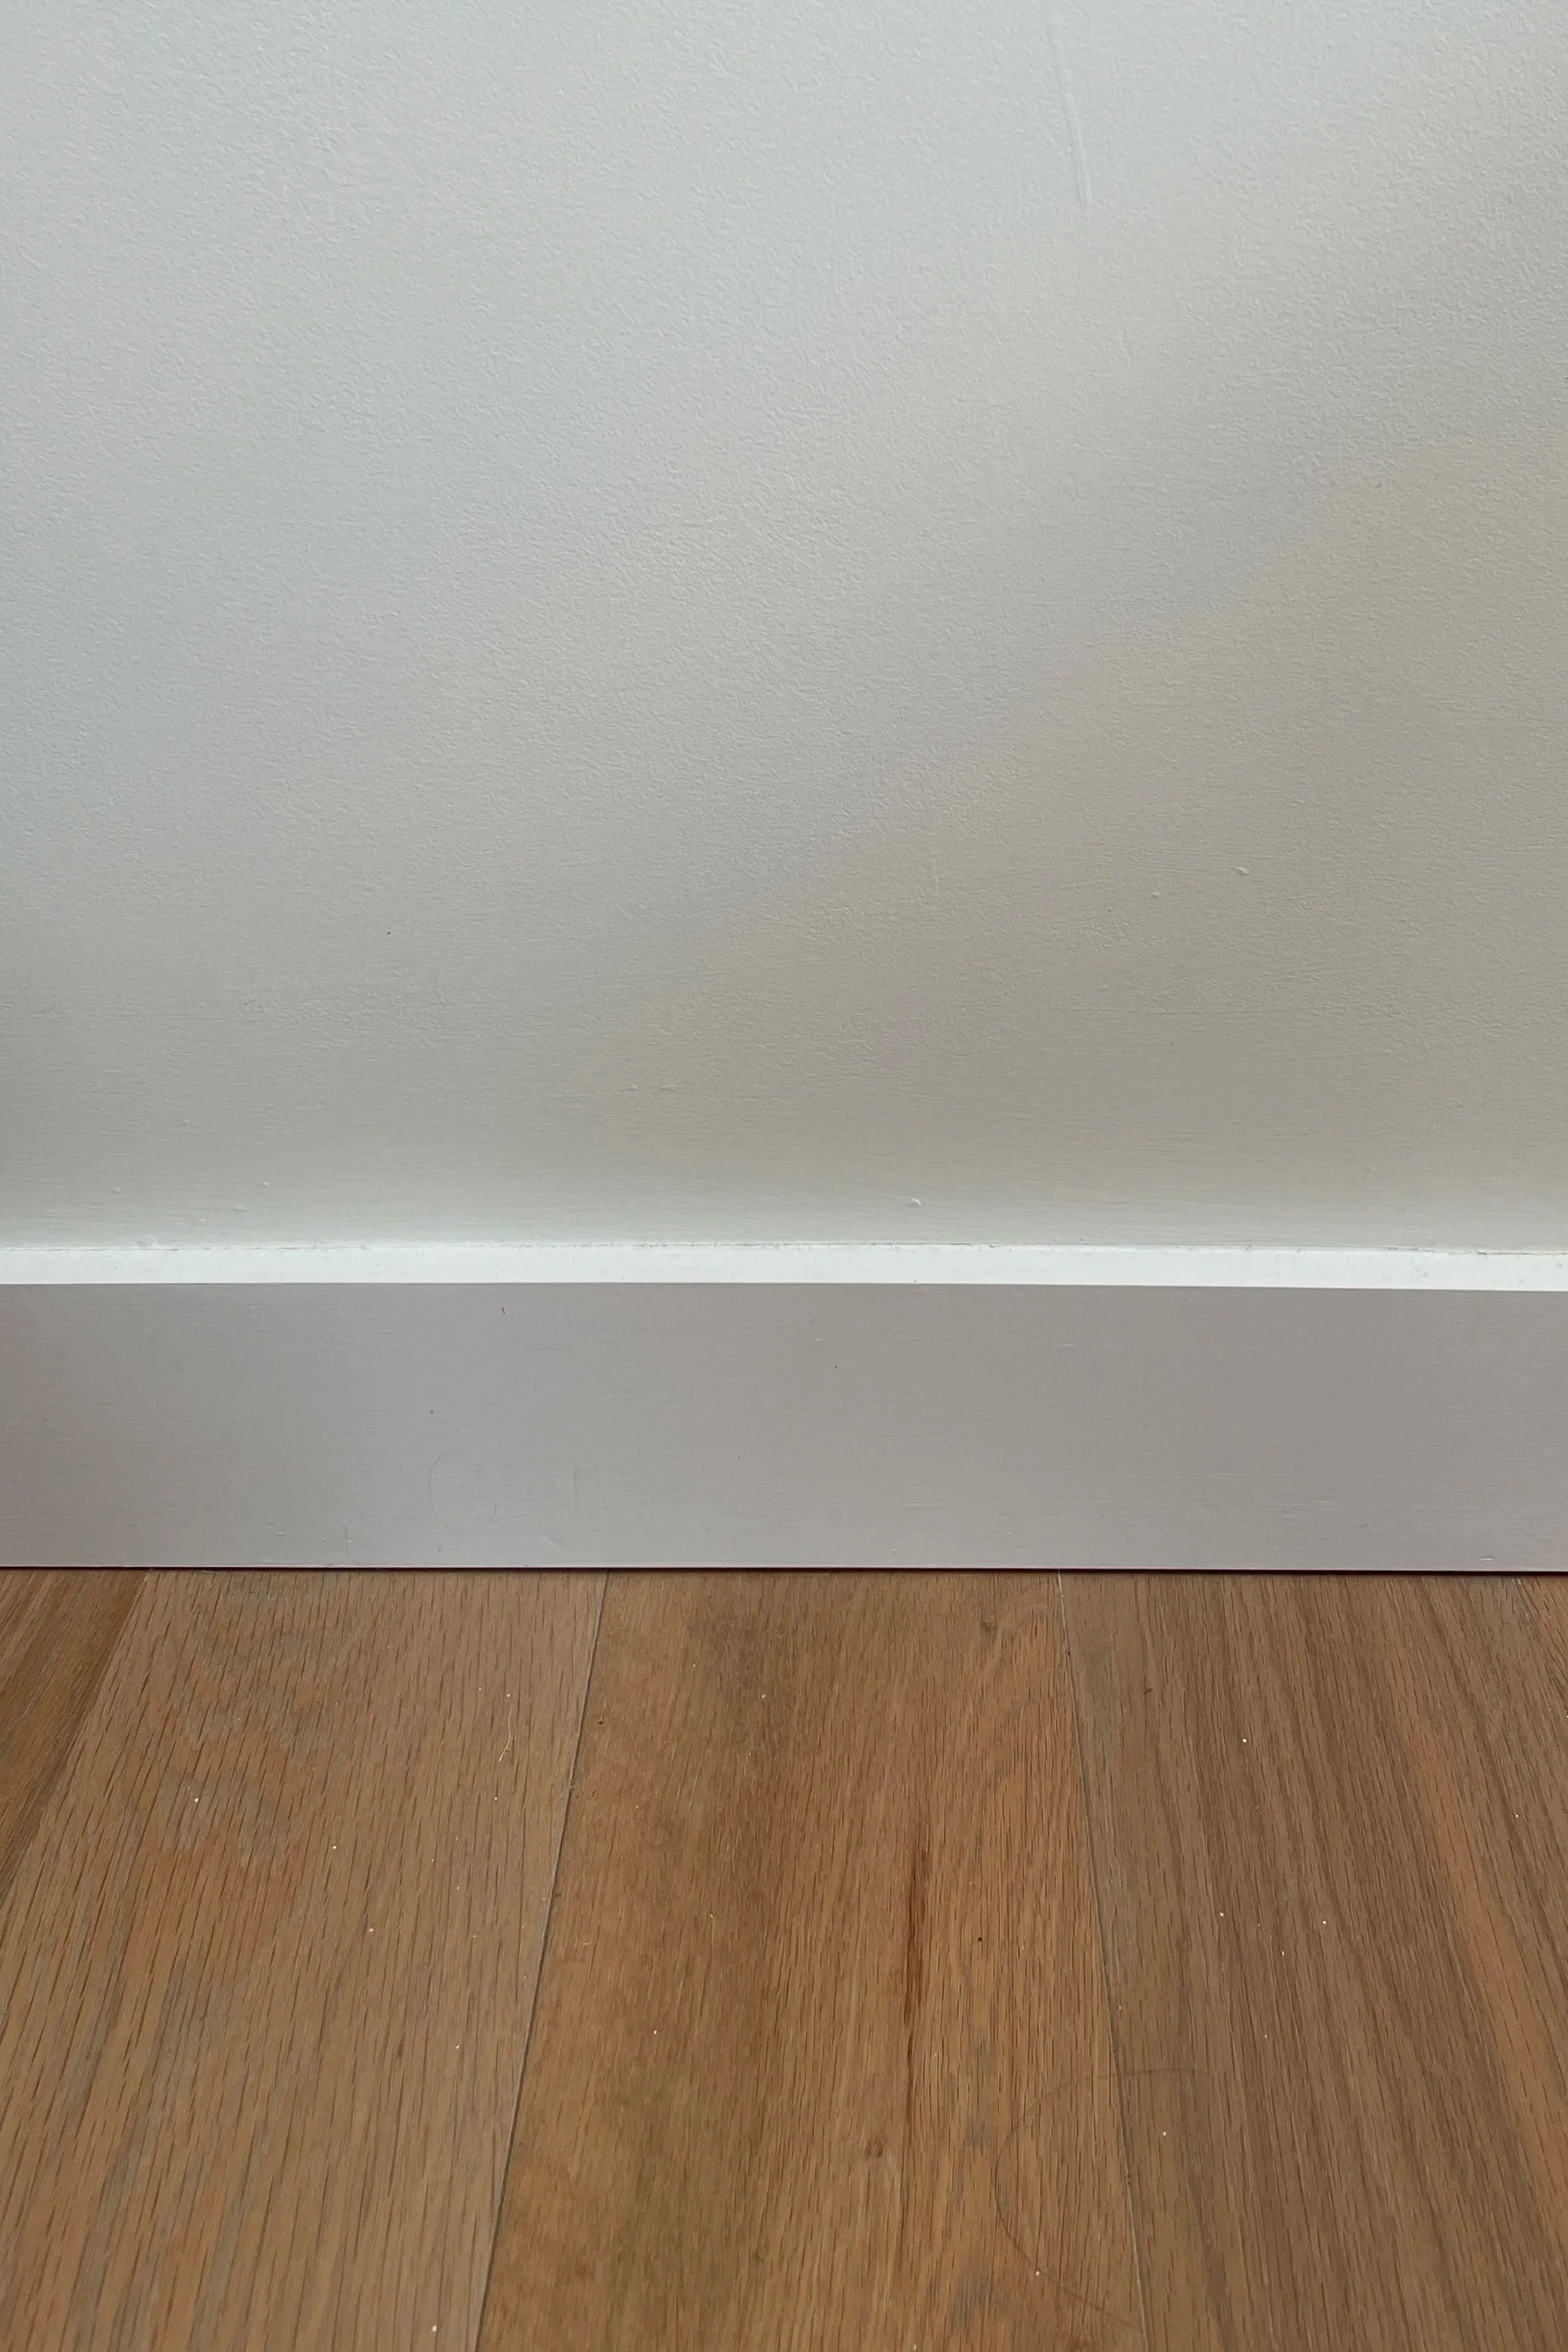
Basic Builder Baseboard
The kind of trim that doesn't offend — and doesn't contribute much either.
Why Baseboard Height Matters
Tall baseboards create a more deliberate transition between wall and floor. They give a room visual weight and, somewhat counterintuitively, can even make ceilings feel higher. In newer homes especially, where walls can feel flat and undefined, millwork is one of the quickest ways to introduce architectural presence.
But proportion is what makes it work. A commonly referenced design guideline suggests baseboard height should land at roughly 7% of ceiling height. With my 101-inch ceilings, that gave me a target of approximately 7-inch baseboards. And that benchmark became the goal—finding a solution that felt substantial without looking forced.
This post contains affiliate links. I may earn a commission on purchases made through these links, at no additional cost to you.
The Three Options
I wasn't starting from scratch. We already had simple square baseboards installed, so the question became how to build on what existed.
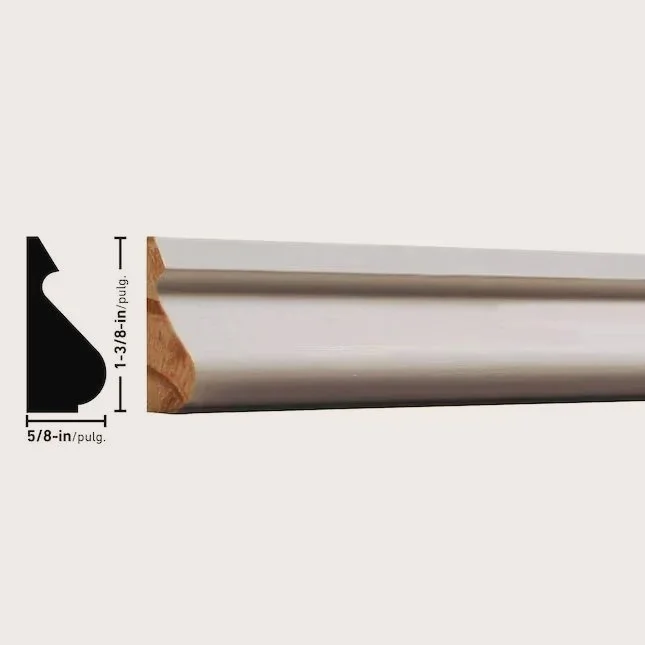
5/8" x 1-3/8" Base Cap Moulding
I started with a single profile throughout — a 5/8" x 1-3/8" base cap moulding. Traditional, versatile, and understated enough to work throughout the house.
Option 1: Base cap on top of existing baseboard (5 inches total)
The simplest solution. The base cap sits directly on top of the existing board, creating a clean two-part profile that feels classic and uncomplicated. The only drawback was proportion. At roughly 5 inches tall, it fell short of the height I originally wanted. Not wrong, just less substantial.
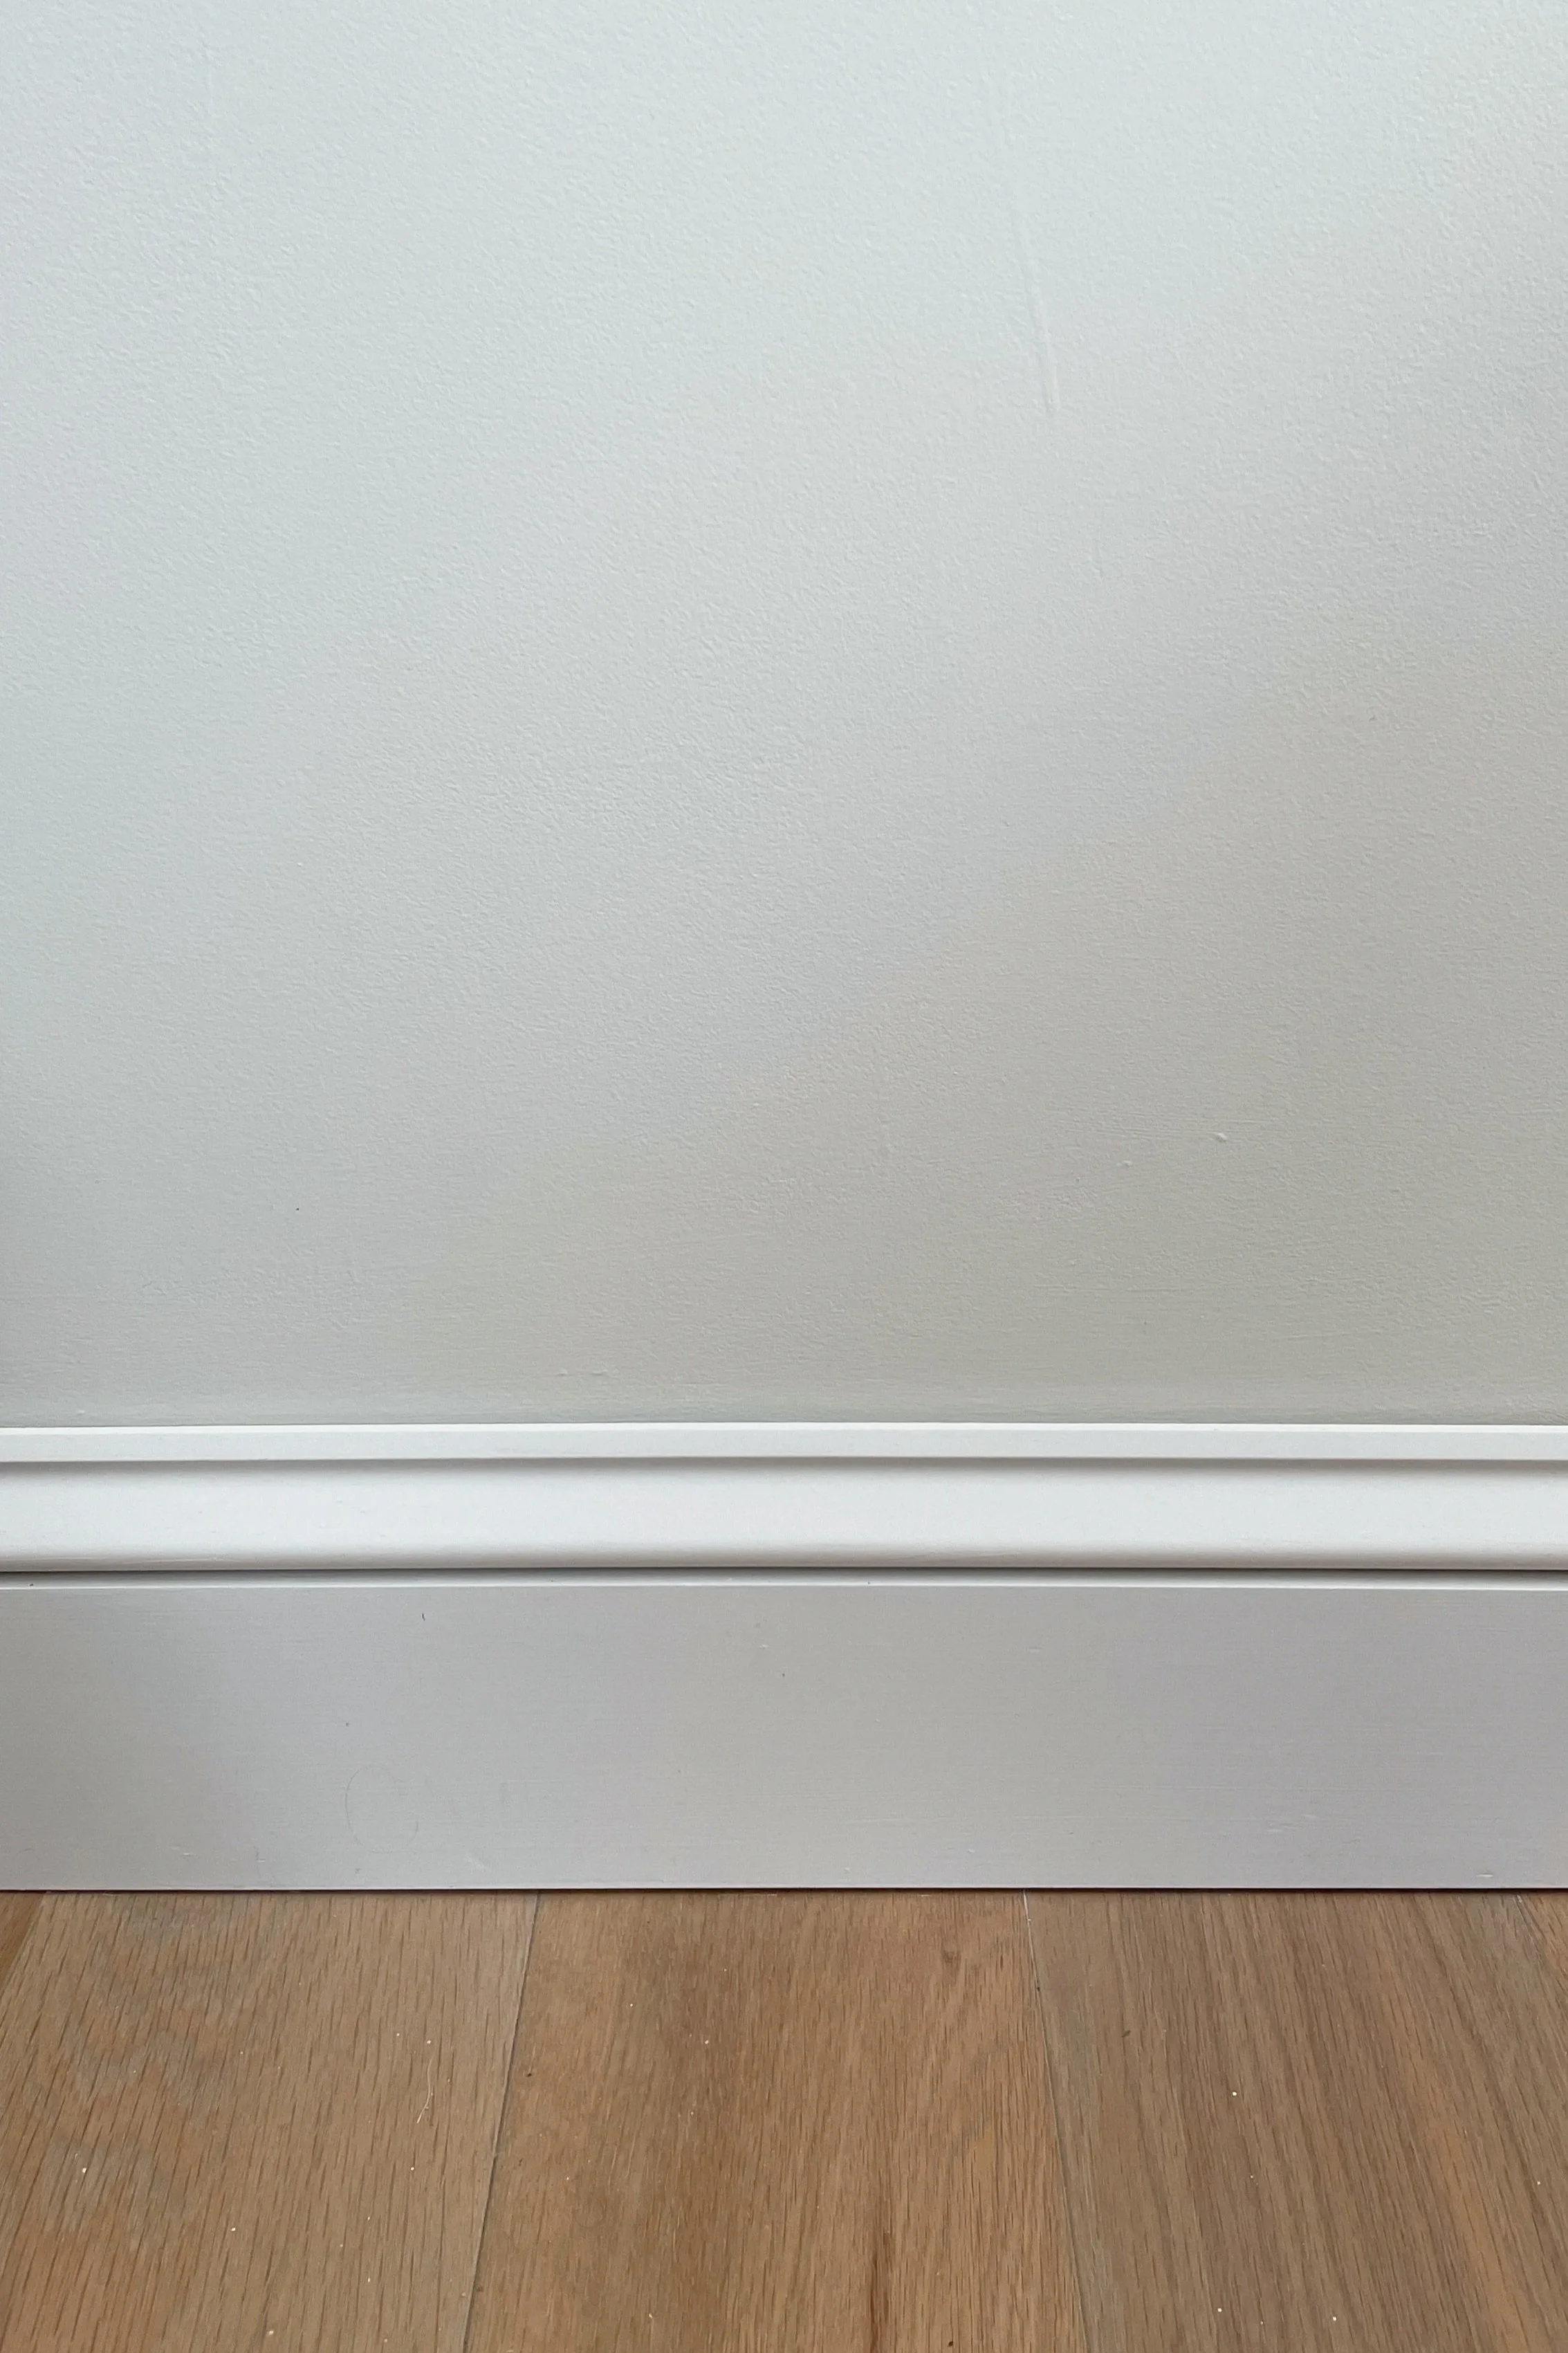
1/ Base cap on Top
Simplest solution. Only 5 inches tall. Less substantial.
Option 2: Base cap floated 2 inches above the existing baseboard (7 inches total)
This approach creates the illusion of a taller custom profile by leaving a gap between the existing baseboard and the new cap. When executed perfectly, it can look incredibly architectural — but it demands precision. The spacing has to be exactly uniform along the entire run, and the wall surface behind the gap needs to be in genuinely good condition. Any variation in the gap or imperfection in the wall becomes part of the finished detail.
2/ Base Cap Floated 2 in. Above
Creates the illusion of a taller baseboard.
Option 3: Base cap + 1x2 riser + existing baseboard → (7 inches total)
At first glance, this was my preferred option. It immediately achieved the 7-inch height I was aiming for, and the addition of the 1×2 solved the alignment issue entirely. The plan was straightforward: install the 1×2 first, then attach the base cap directly on top without needing to finesse spacing or placement.
Visually, it achieved the exact look I wanted.
The concern, unfortunately, was longevity.
3/ Base cap + 1x2
The height I wanted. Sadly, longevity was a concern.
Why Option 3 Didn't Make the Cut
After posting the three options on social media, the feedback was surprisingly unanimous. Finish carpenters, contractors, and designers all pointed to the same concern: the seam between the 1x2 and the existing baseboard would eventually reveal itself.
The plan had been to sand the joint flush and paint over it. But wood shifts. Paint flexes. And over time, hairline cracks begin to appear. Several professionals shared that they had used similar methods before and ended up revisiting the work a year or two later.
It was exactly the kind of feedback I needed. I had become so focused on achieving the correct height that I hadn't fully considered the long-term durability of the build itself.
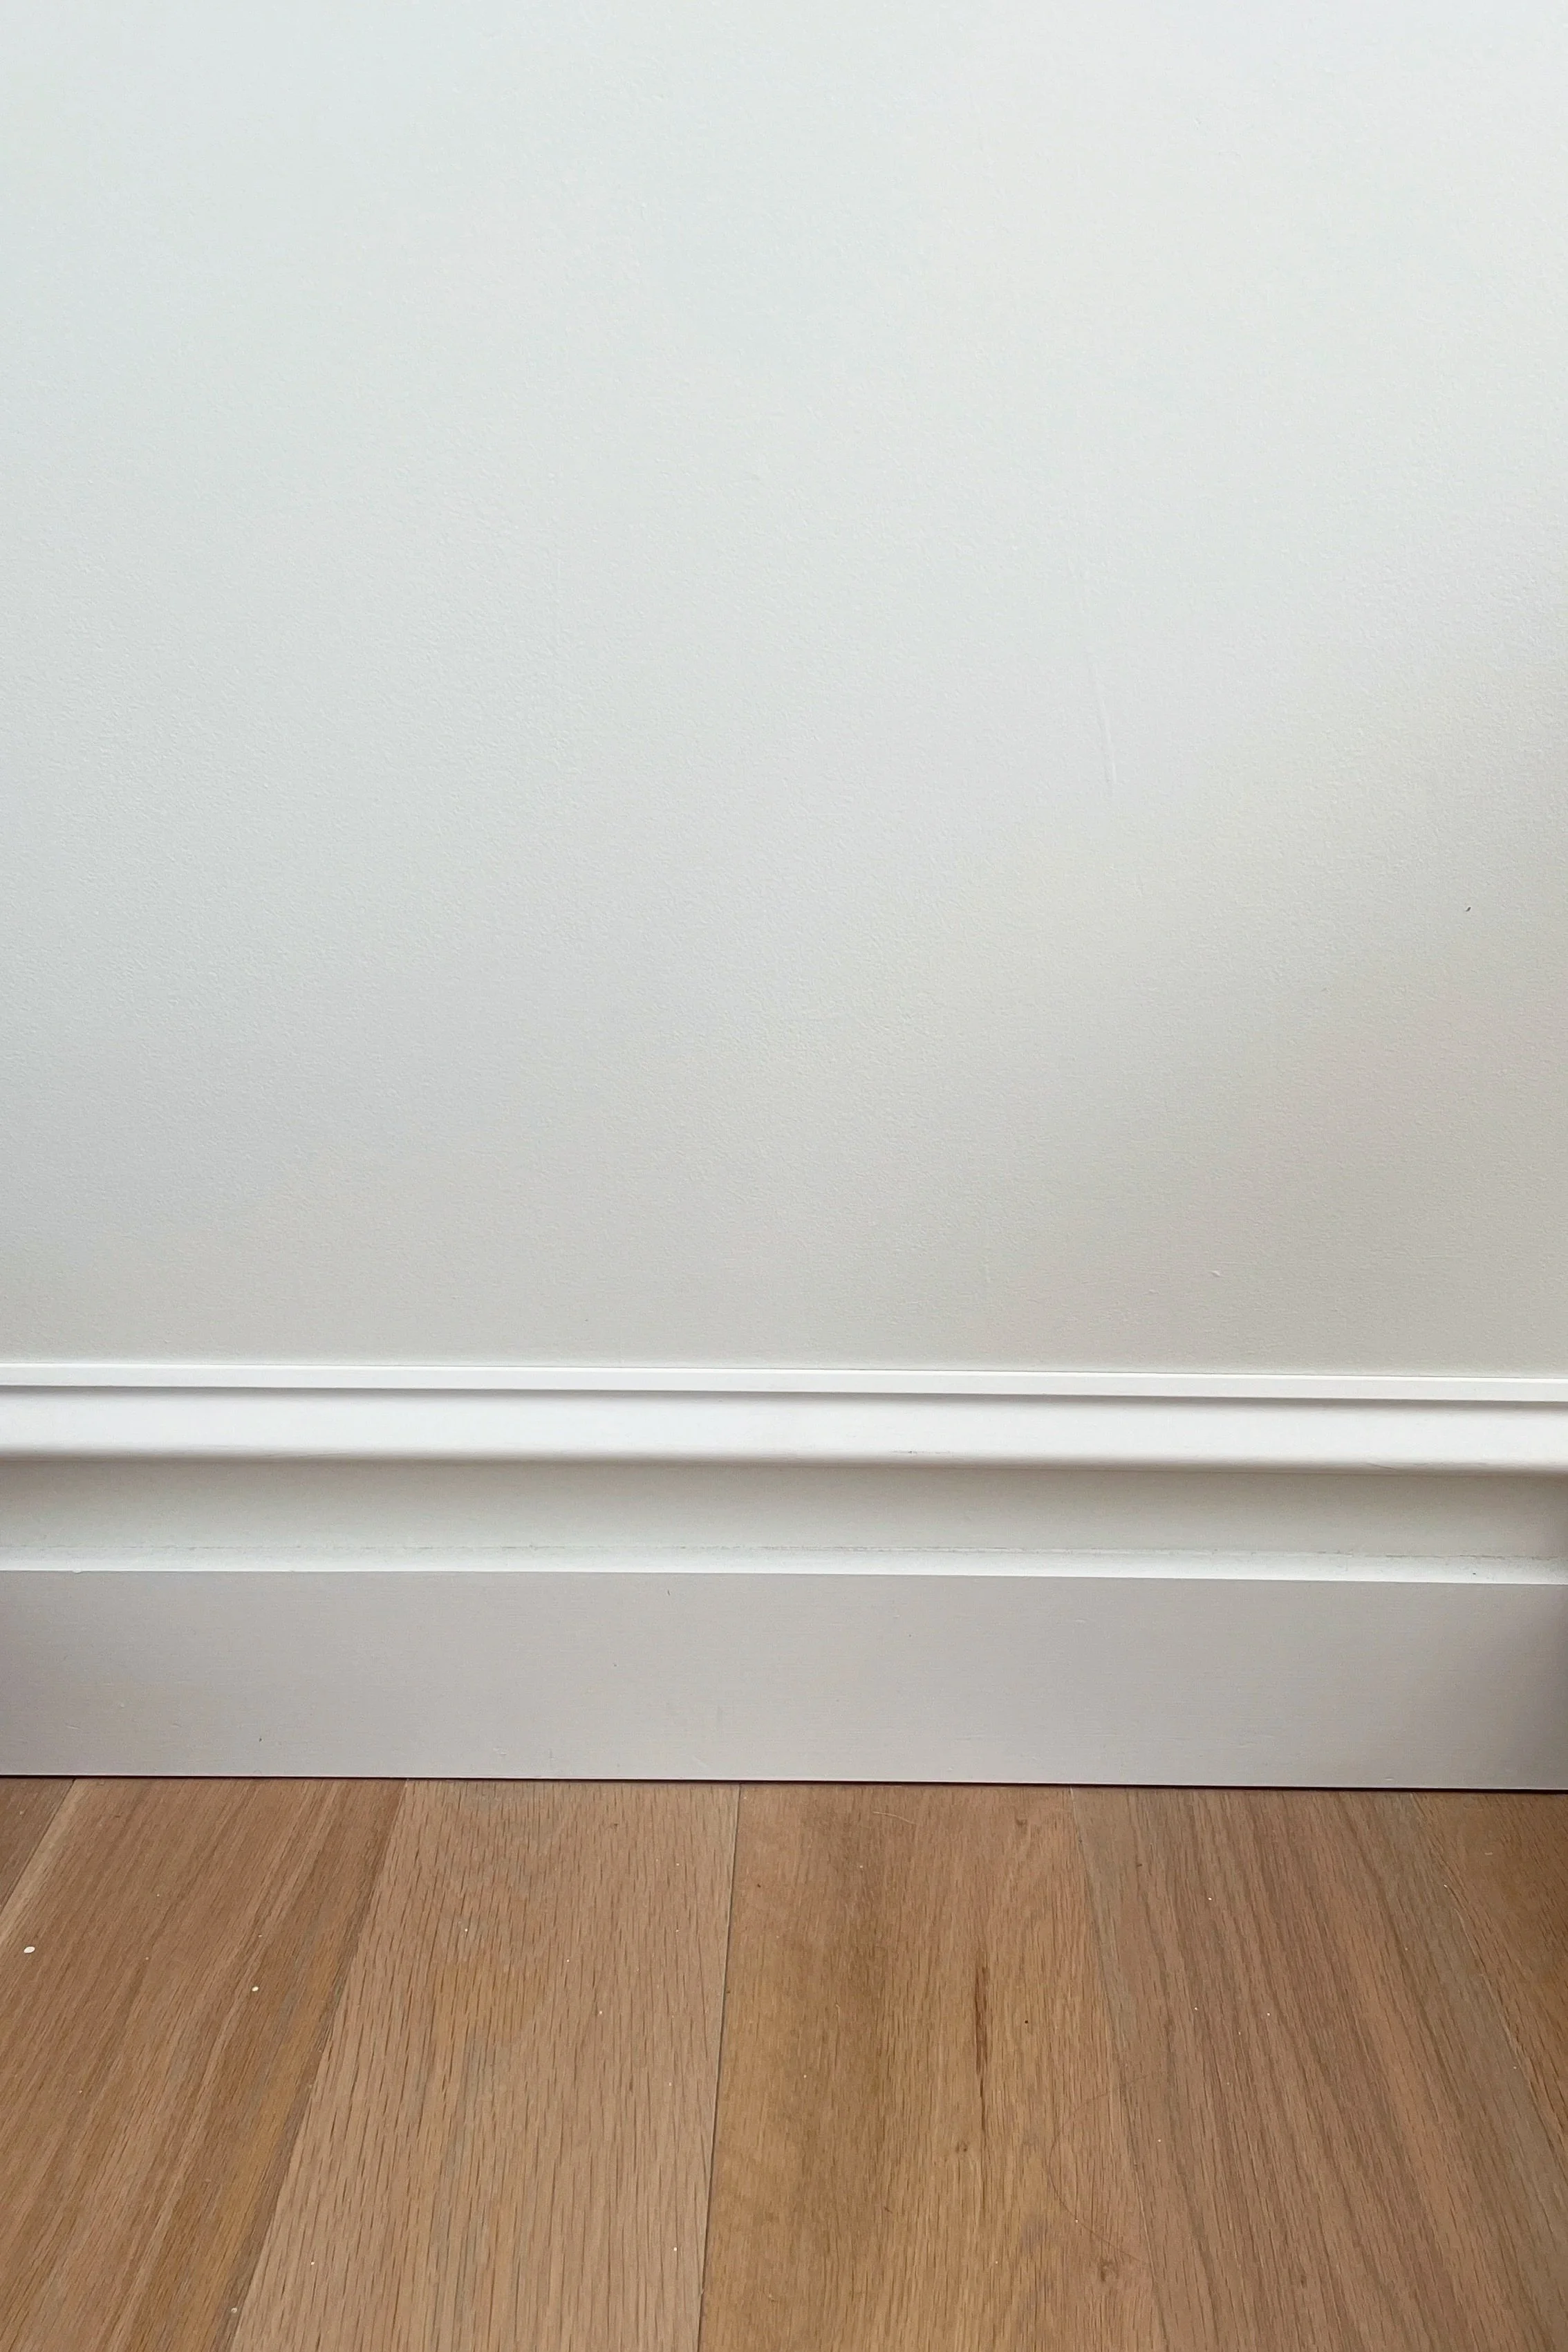
What I Chose and How It Looks
I ultimately went with Option 1: base cap directly on top of the existing square baseboard, for a total height of approximately 5 inches. Not my original target, but the right call for the house.
The kids room is finished now, and the difference is significant. The profile feels cleaner, more architectural, and far more substantial than what was there before. It gives the room a sense of structure without feeling ornate.
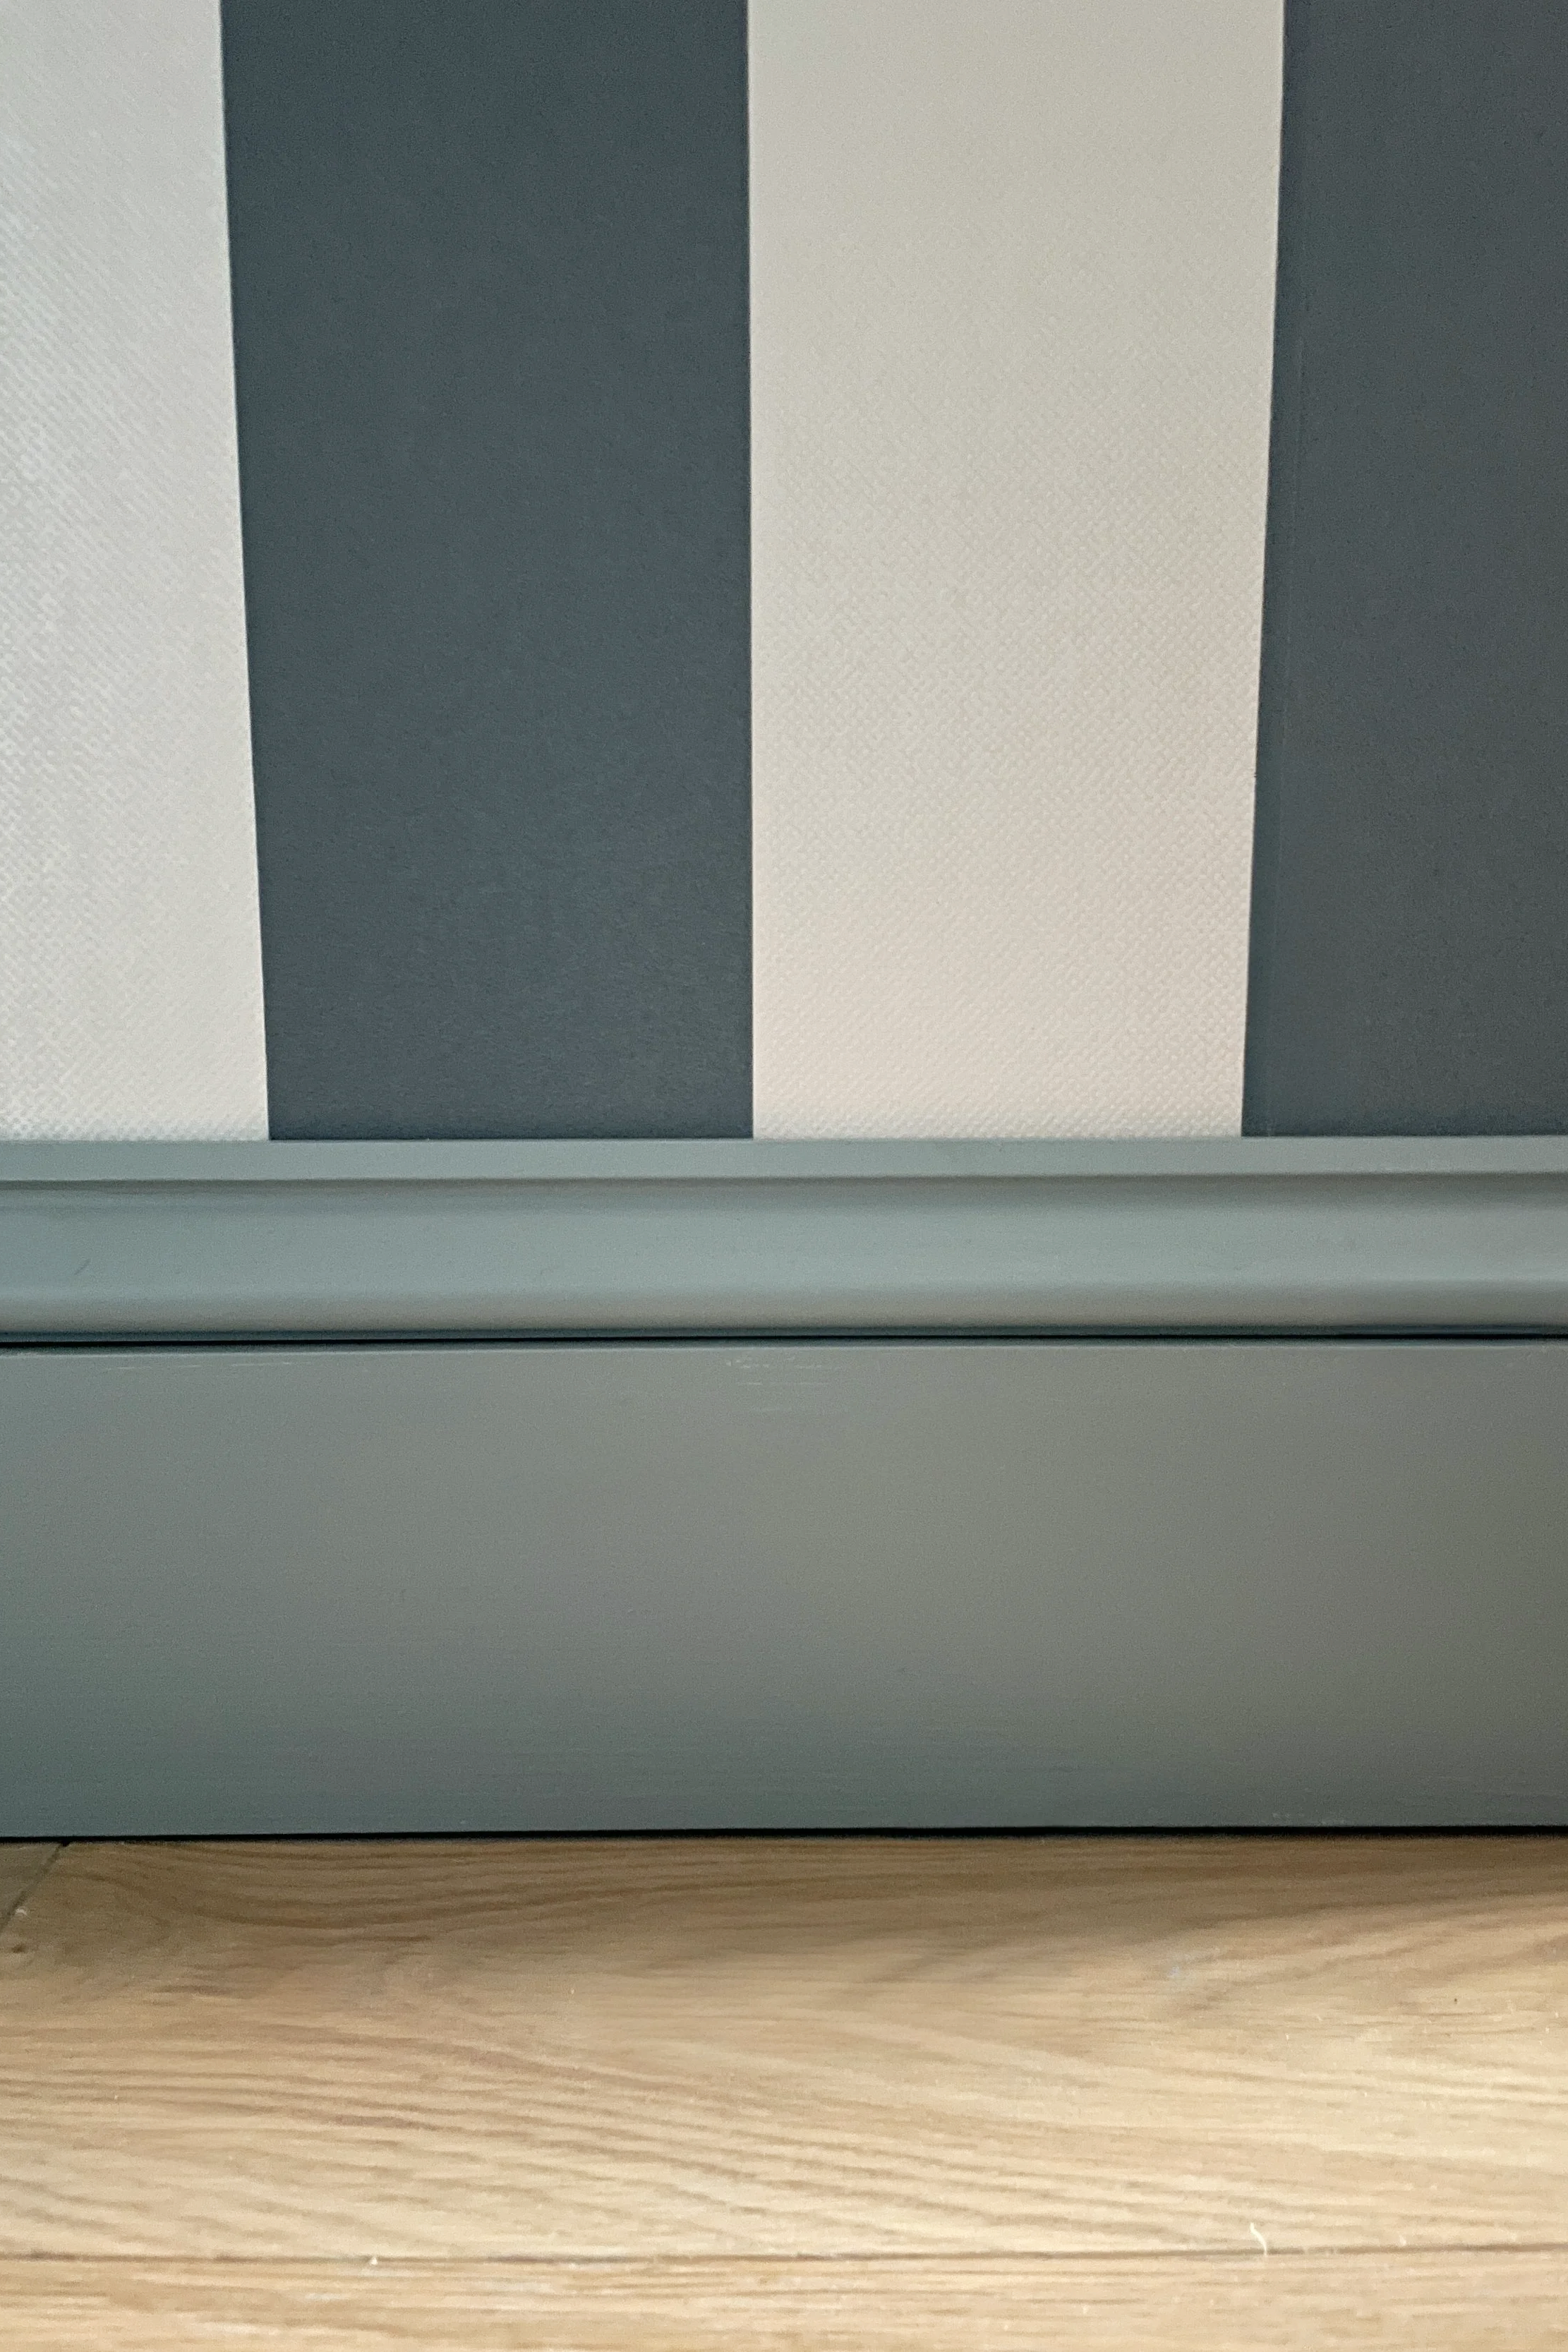
Baseboard Winner
Base cap moulding will be added to the baseboards room by room. Here it is in our kids’ room.
What's Next
Once the entire house is finished, I'll have a better sense of whether the 5-inch height feels sufficient throughout. There may be a version of this where an additional layer of base cap introduces more height without the seam issues of the 1x2 approach. I'm still thinking about that. For now, the baseboards are going in, room by room. Progress over paralysis.

